

well hey there! my sincerest apologies on the delay in getting this last leg of the clover tutorials up - but i assure you i have perfectly good reasons. this past weekend was a rather momentous one at work and i spent the early part of this week just recovering. then once i finally got my sewing pants back on - wouldn't you know - i ran out of thread!! now this may not seem like a crisis to anyone else but, i live on an island people. the closest joanne's is 30 minutes away and my husband and i are a one car household. picking up sewing supplies isn't just something you do on your way home from work. it requires planning and strategizing...
okay, now i got my excuses out of the way... lets get back into our clover adaptation. as promised, i have the final installment of the clover metamorphosis ready for you. today i will cover how to sew your pockets and finish your waistband to complete your stylish and svelte trouser look.
enough with the dilly-dallying! lets begin with the pockets!
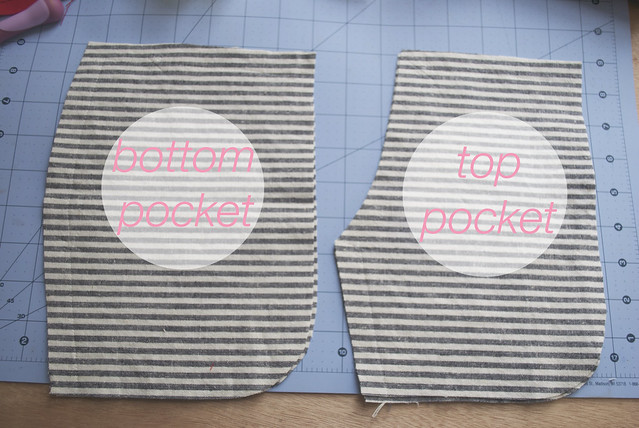
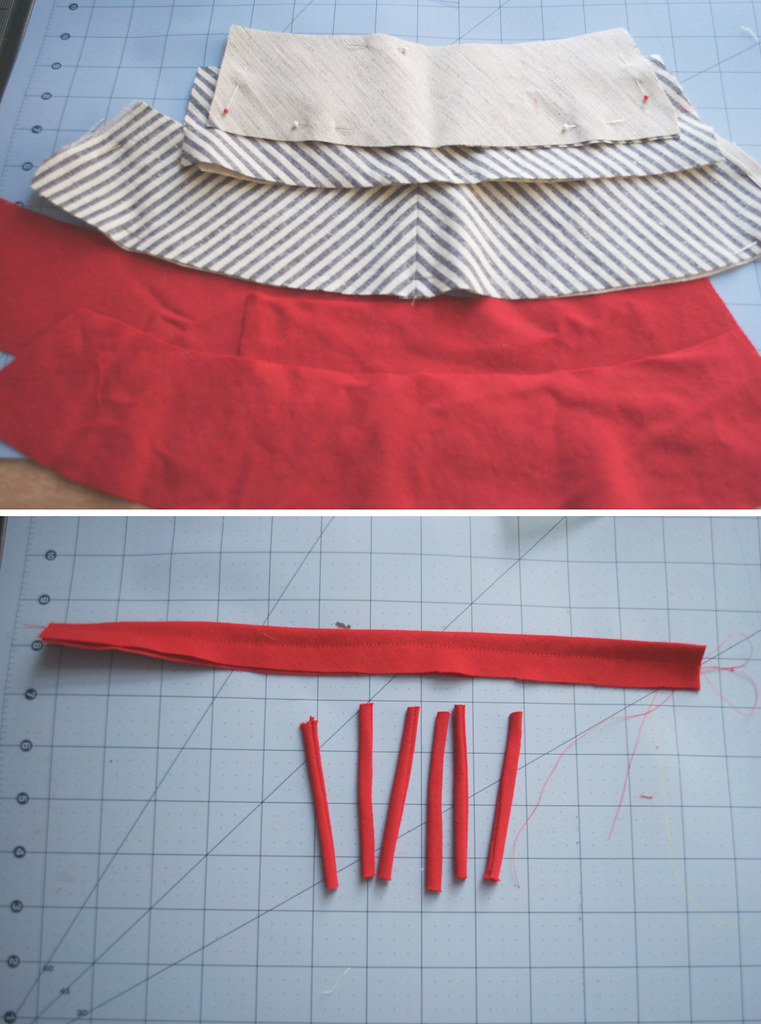
you should have four pocket pieces - two that follow the line of your pocket opening and two that follow the curve of the hip. for this tutorial's sake, we are going to call these two pocket pieces the "top pocket" and the "bottom pocket" . i'm sure they have some official term - like "pocket bag" and "pocket facing" or something but since i'm not totally sure what those terms are i just made up my own - you hip to my jive? picking up what i'm putting down? smelling what this rock is cooking? good. let's move on.

1. isolate your bottom pocket pieces. if your pockets are made from a different fabric than the body of your pants you may want to create patches for the bottom pocket pieces so the contrasting fabric doesn't show. or you can make the contrasting fabric part of your design - in which case skip this step. but if you don't want your pocket fabric to show - make a patch out of your fashion fabric that is longer and wider than your marks for where your pants will line up with the pockets. finish the edges of the patches by zig zagging, pinking, or overlocking. all my seam finishes will be done with my overlocker (serger). sew the patches onto the bottom pockets, lining up the outer edges and top corner.
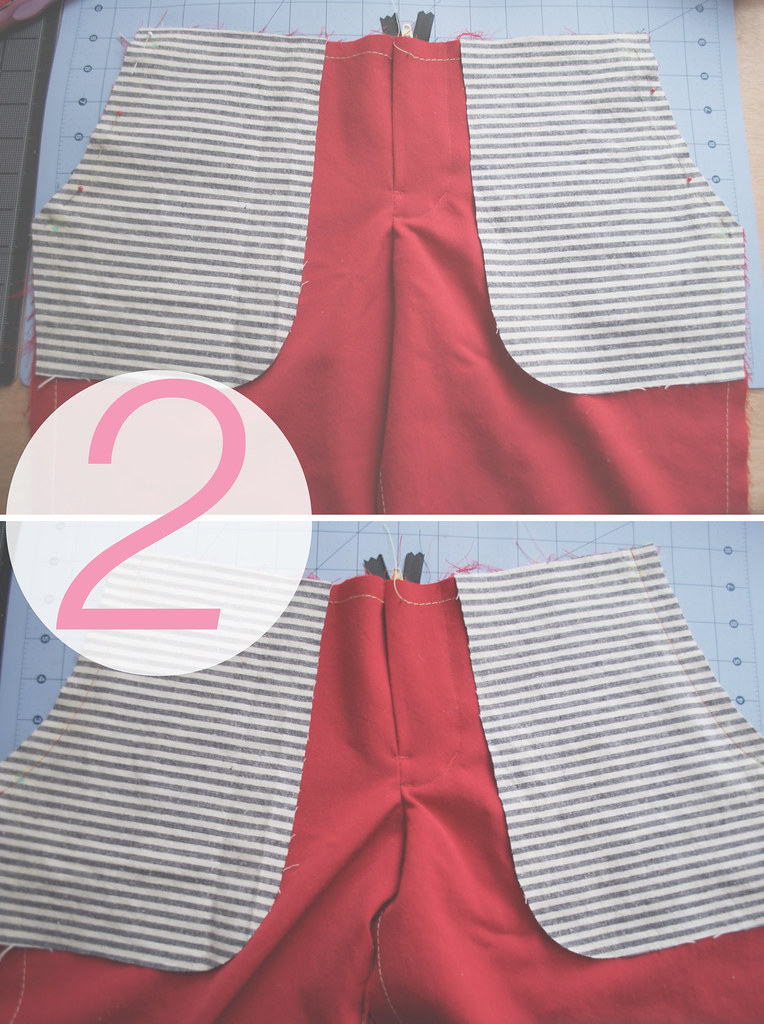
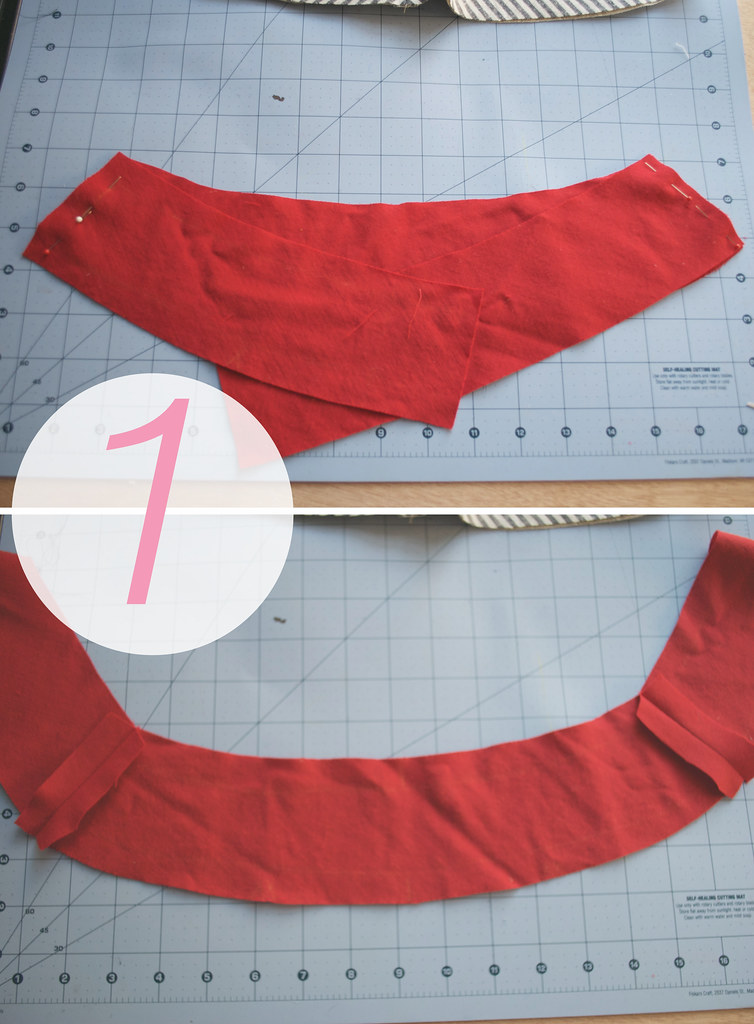
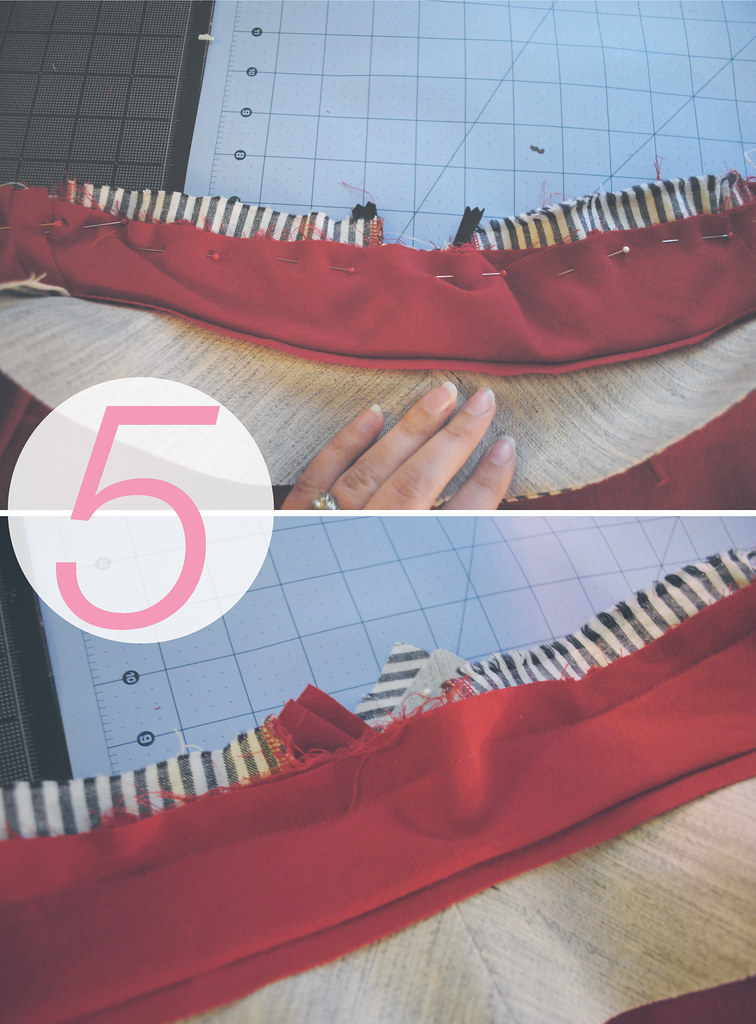
2. lay your top pocket pieces, right sides together, on top of your pants. align the pocket opening and match up the dots. pin in place and stitch.
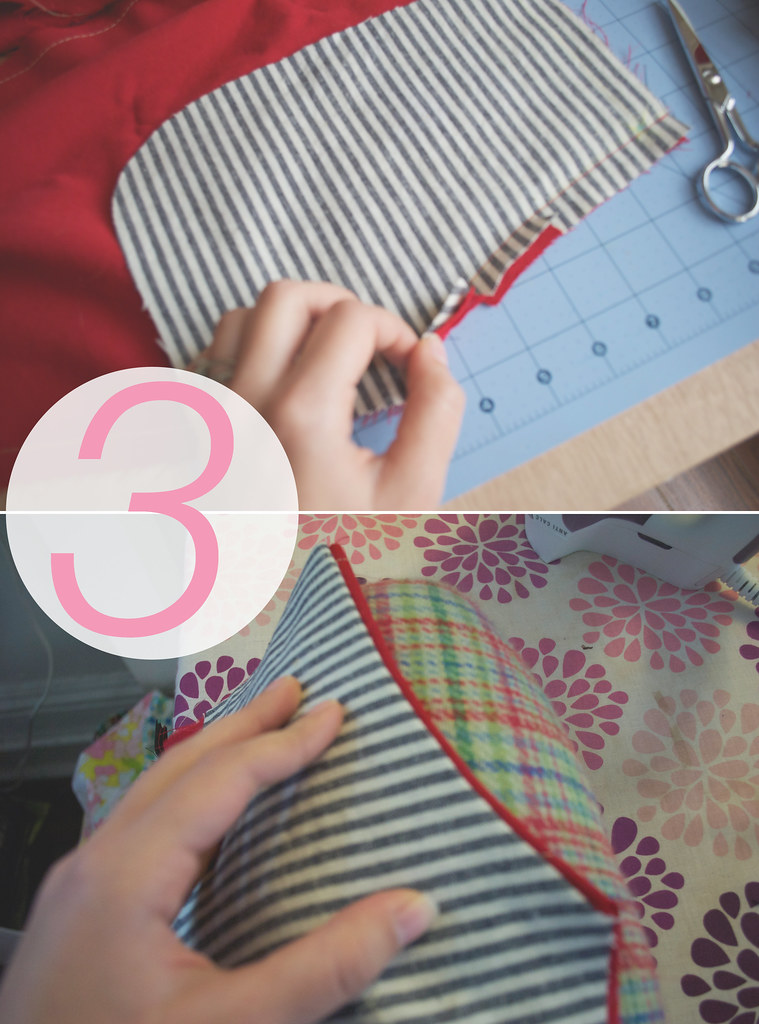
3. clip the curve of your seam allowance (if applicable) turn the top pocket to the inside of your pants and press. when you turn the top pocket, pull it so about 1/8 of an inch of the pants fabric pulls to the inside, this will make the pocket fabric less obvious when/if your pockets pull when you sit/walk etc.
4. topstitch your pocket opening about 1/8 of an inch away from the edge. for a more "jeans" look, topstitch again 1/4 inch away from your first row of stitching.

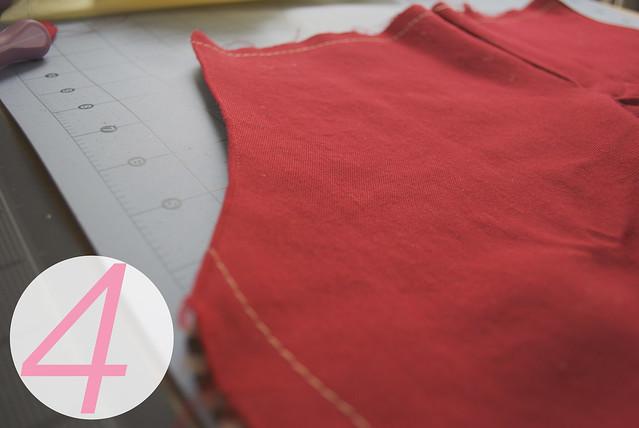
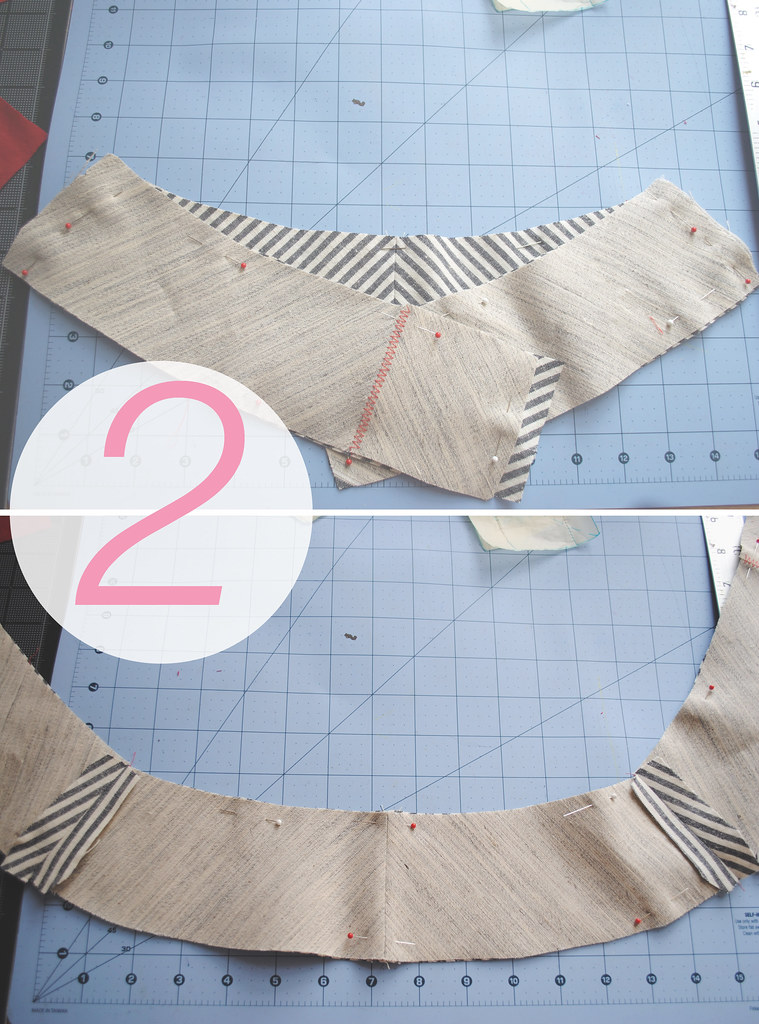
5. with your pants facedown, pin your bottom pocket to your top pocket, aligning all edges and marks. its super important that you accurately line up your marks along the hip and waist because this will affect the fit of your pants. stitch the pockets together along the inner edges and finish the edge. there's no need to finish the top or side edges since those will get encased in the seams. baste along the top and side to hold your pockets in place during the rest of construction.
note: if you don't have a serger and are looking for a more professional looking way to finish your pockets, tasia did a great tutorial a while back on finishing your pockets with a french seam. this tutorial also gives some great thoughts on other pocket related matters - like reinforcing your pocket opening.
and there you go! you totally have pockets on your pants! from here you will want to continue constructing your pants, sewing your pants backs together and sewing your inseam and outerseam. something to note at this point - because we sewed the front pieces together when we constructed our fly, you may want to construct your pants a little differently than the instructions in the clover pattern. i think its easiest to proceed as follows:
- sew your pants backs together at the center crotch seam
- if you're putting in welt pockets or any sort of back pocket, do it now
- sew your pants fronts to the backs at the inseam - starting at the center of the crotch and working down each leg separately. for a more casual look - topstitch this seam.
- if you are going for the jeans look you may want to topstitch your crotch seam
- sew your pants fronts to the back at the outerseam.
lets pickup at the waistband.
materials you will need:
- your almost completed clover trousers
- all your waistband pieces - one back piece and two front pieces plus facing pieces that should be interfaced (i'm using hair canvas that was left over from my red jacket)
- a hook and bar closure
- a button (optional)
- scissors, thread, etc.
- your belt loops (optional).
i made my belt loops by folding a piece of bias cut fabric in half and sewing about 1/4 inch from the folded edge. then i trimmed the seam allowance and turned it and cut it into six 3 inch long pieces. there are so many different ways to make belt loops - this is just how i did it this time - i did it differently on my denim trousers - but this worked pretty well for me.
1. lay your waistband pieces right sides together. pin together at the side seams and stitch. press seams open.
2. lay your waistband facing pieces (with interfacing) right sides together. pin at the side seams and stitch. press the seams open.

3. lay your waistband facing pieces right side up. lay your belt loop pieces on top of the facing pieces at even intervals, measuring the spaces in between to make sure they are evenly spaced. lay your waistband right side down on top of the facing, sandwiching the belt loops in between. pin in place along the top edge and stitch.

4. trim down and grade the bulk in the seam allowances. turn right side out and press. either understitch the facing or topstitch the waistband 1/4 inch from the edge. i decided to topstitch my waistband - i don't really have real a reason for this, i just liked the way it looked! i also felt that it stabilized my bias cut waistband (more on that later).
5. hold your waistband facing and belt loops out of the way and pin just your waistband to your pants, right sides together. match up all points - but especially the side seams. stitch.

6. trim down and grade the seam allowances in the waistband. trim down your extra zipper tape at this time. you can just cut through the zipper teeth. press your seam allowance towards the waistband.
7. okay. this is where my instructions get a bit vague. i ended up doing things very differently this time than i did the first time so i was sort of figuring it out as i went along. sorry!
anyway. find your hook and bar pieces. i'm using the kind that you push through your fabric rather than the sew on kind just because i think they are sturdier. i decided not to do an extended tab closure on these pants just because i wanted a cleaner front - but you can make an extended tab closure by simply... well... extending your waistband! wherever you want your tab to stop - measure in 1/2 inch from there and that will be where you will put your hook. the hook will go on the overlap of the waistband. the bar will go on the underlap. follow the instructions on your hook and bar packaging to insert them correctly.
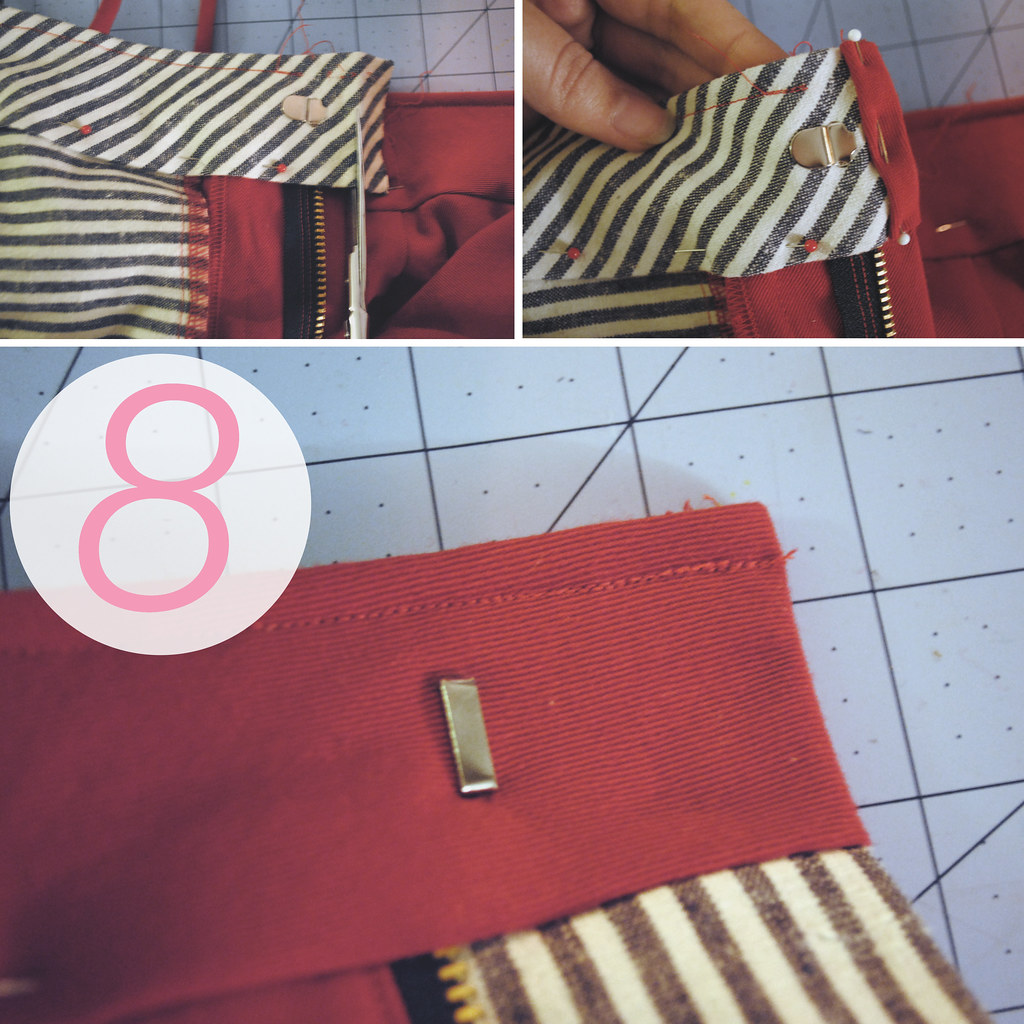
8. finish each edge of your waistband by trimming your waistband facing down (either even with your fly edge, or where you've extended your waistband tab to). fold the extra waistband fabric around the cut edge of the facing. pin in place. you can either topstitch this fabric down - or i prefer to finish this bit by hand, using a draw stitch or fell stitch for a nice clean edge.
note: if you've topstitched your waistband - like i did - you may find yourself ripping out a few of your stitches. its no biggee, just re-topstitch once you get everything into place. or do as i say and not as i do and leave about an inch unstitched at either end of your waistband and just finish the topstitching after this step.

9. finish the inside of your waistband facing. there are a lot of great ways to do this. you can turn the edge under and topstitch it down, or "stitch in the ditch". one finish i've always admired was a bias trimmed edge. it always looks fantastic - though i've never quite got the knack down. my preferred method - because i might be a crazy person - is to finish the waistband by hand. i turn the edge under and fellstitch it in place. i did this on my denim pair as well, which have got a lot of washing, drying, and wearing, and the handstitching has held in place beautifully.
here is a tutorial on the colette website where sarai shows you how to finish the clover waistband with bias binding. you will have to adapt it a bit since we're dealing with a front fly, not a side invisible zip.
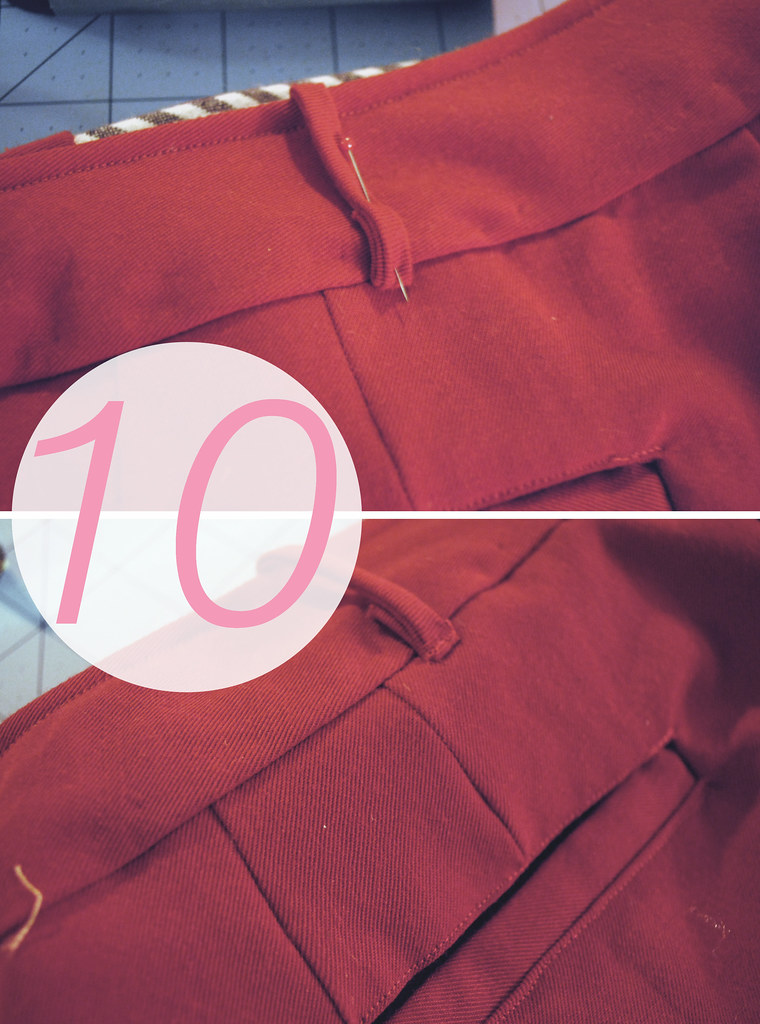
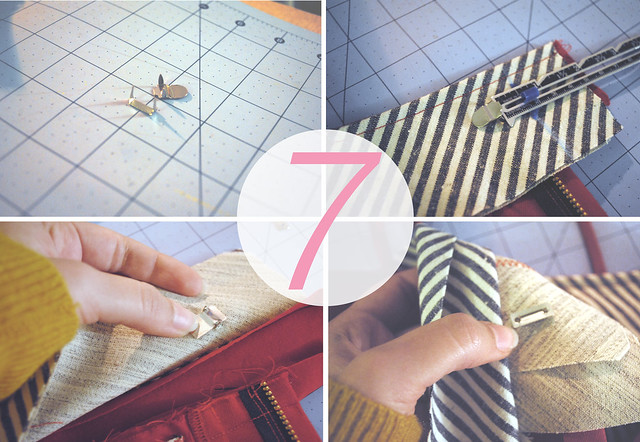
10. final step! press everything in place and fold your belt loops over your waistband. pin them firmly in place and bar tack them in place. this is easiest if you extend your belt loop just past your waistband, so you're actually sewing your belt loop onto the body of your pants. you can trim down the extra bit on the inside if you want.
on my denim clovers i actually sewed the belt loops into the waistband when i attached the waistband to the pants - but honestly, while this seems like it would work well - they kind of pulled weird at my waistband and i wasn't totally happy with the result. so i did it this way this time and i like the results much better.

and there you have it! fully refashioned clovers! phew! is anyone else exhausted?
i want to point out a few things before we're done - just some lessons learned that i'd like to pass on:
first, i didn't do a button and buttonhole on these pants because i didn't have enough room - but typically if you are doing an extended tab closure you'll want to do a button on the opposite side to hold everything nice and neat.
second, i only did the one hook and bar on my closure - this works quite well, but i wish i had put two hook and bars, one on top of the other.
now all you have to do is hem your pants - and of course model them! it might just be me, but i kind of think the clover pattern gives good butt....
if you missed the earlier clover tutorials you can find them here:
xx
Thanks Sallie, that is fantastic. Your pair inspired me to buy the pattern in the first place so I'm so glad I won't have to try and work out how to do all the modifications myself (I'm pretty new to the whole sewing caper). And I must say it's perfect timing... I'm just starting my clovers today!
ReplyDeletehurray for the tutorials! you may pockets look sexy! xxoo
ReplyDeletemake.... you MAKE pockets look sexy. and for the record may all our pockets make us look sexy too. thanks again!
DeleteThese are amazing! What a lovely pair of trousers! And, what?! You live on an island?!?! That sounds fabulous!
ReplyDeleteThanks!! I still haven't hemmed them (oops!) but when I do I'll be posting some outfit shots. And I DO live on an island - Galveston Island - its pretty beach bumming fabulous most of the time, but not when I need emergency thread...
DeleteWow, this has been a very thorough tutorial! Well done! and these are so clean-looking. I've never seen those push-through hooks and eyes. I must find... I really don't like sewing those on.
ReplyDeleteThe push through hook and eyes are a lifesaver! I think I bought mine at JoAnne's...
Deletethank you so much for this wonderful series of tutorials and the instructional photographs!! I'll be sure to refer to it as soon as I can
ReplyDeleteHi Sallie! I live in the Houston Heights. We're sew neighbors! Anyway, your clover tutorial has rocked my world. I saw a Gap ad about colored khaki pants and was thinking if only I could put a zip in the front of my Clovers... Here it is. I can't wait to make my own. Thanks!
ReplyDeleteHey Stacie! When I was in Houston (moved to Galveston about 6 mos. ago) I lived in the Heights - its such a great neighborhood! I feel like there's a lot of Houston sewists - we should have a meet up!
DeleteI hope the clover tutorial is useful! I've been loving all the bright Clovers I've been seeing - good luck with yours!
I'm all for a good meet up, I'm out commission currently, but maybe we could shoot for late Spring/dog days of summer? :-) E-mail me if you are interested. I bet we could have a good turnout. stacie at staciethinksshecan dot com
DeleteSallie, I have a non-sewing related question for you. How do you make the cute little number and text circles that you put on your photos? I'm trying to figure it out.
ReplyDeleteHey Montana! I do all that sort of stuff in Photoshop. I have a tiny old mac laptop that has Photoshop on it and thats about all it does anymore! So I do all my photo editing and graphic stuff on there then transfer it all onto my bigger desktop. In Photoshop I just choose the ellipse tool and position it where I want in my photo - then play around with the opacity and then make a text box for the number/words. Some of the other little circle graphics that I make - like the buttons on my sidebar - are more complicated, but they're all in Photoshop too. I'm not sure if there is another program out there that can make the little shapes..? I know Piknik can't...
DeleteSo a quick google search tells me that a good free program for photoshop-like stuff is GIMP
Deletehttp://www.gimp.org/about/introduction.html
Just in case you don't have Photoshop - it looks like you should be able to do all the same sort of stuff with that program. Also - any time I use text - like in the very last picture - each word (or sometimes part of a word) is its own text box. Then I can manipulate and move each word until its positioned where I want it.
Hope this helps! Good Luck!